By: Dwayne Parkinson - Solution Architect
Creating and Using Dependent Choice Lists
In WebCenter Content there is a nifty little feature that gives you the ability to build something called a Dependent Choice List. A Dependent Choice List (or DCL if you like three letter acronyms) is a special metadata configuration where the values in one metadata field depend on the selected value in some other field. An easy example a region and country; where the list of available countries is limited based on which global region you select. Let’s dive right in and create our own Region and Country DCL so you can see how they work.
Step 1: Create Two Metadata Fields
All of the work to create a DCL will be done in the Configuration Manager. Select the Administration menu, then start the Admin Applets. Finally, invoke the Configuration Manager tool and select the Information Fields tab.
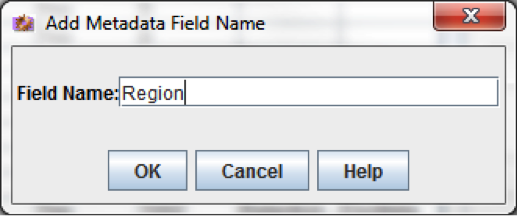
Create a field for Region and a field for Country by clicking on the Add button.
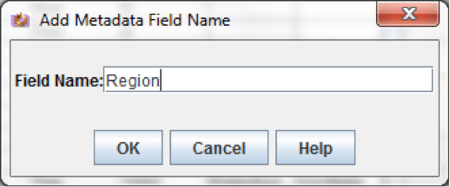
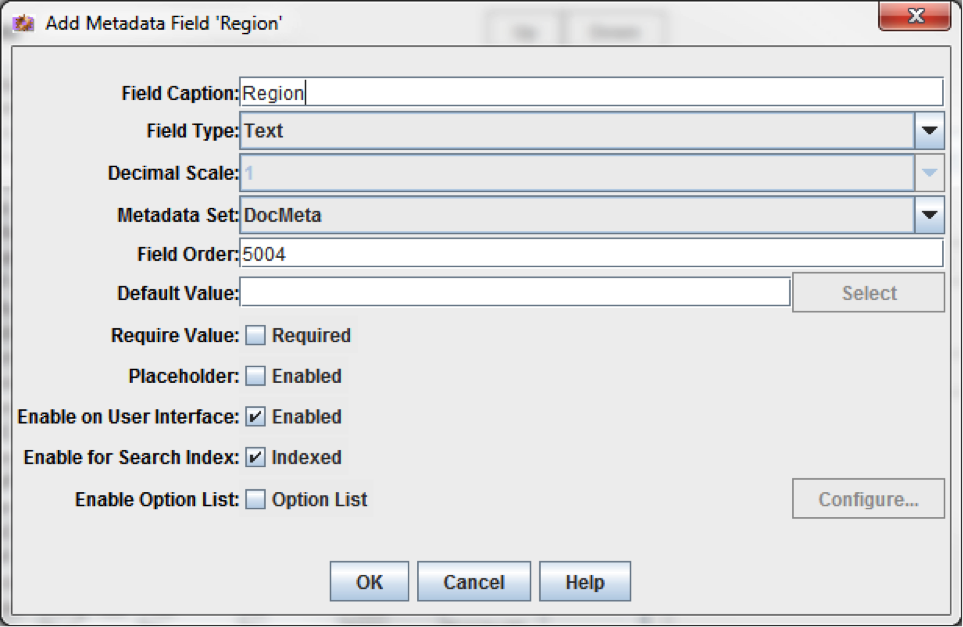
Fill in the name of the new field and then click on OK.
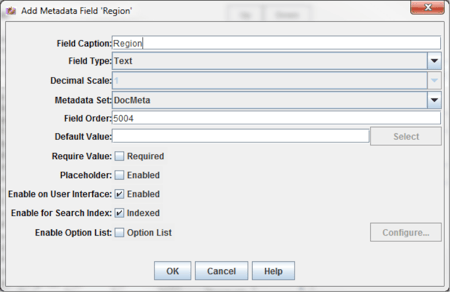
On the detail screen for your new Region field just accept the defaults for now by clicking OK. Do the same for Country. You will notice that once the new fields are added the Update Database Design button is enabled.

Click that button to add your new fields to the database.
Step 2: Create a Region Table
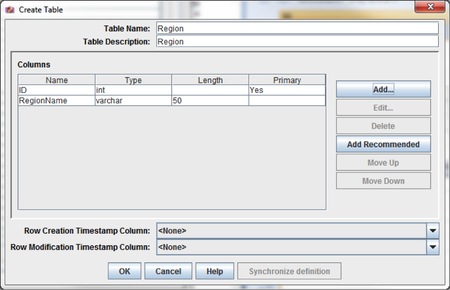
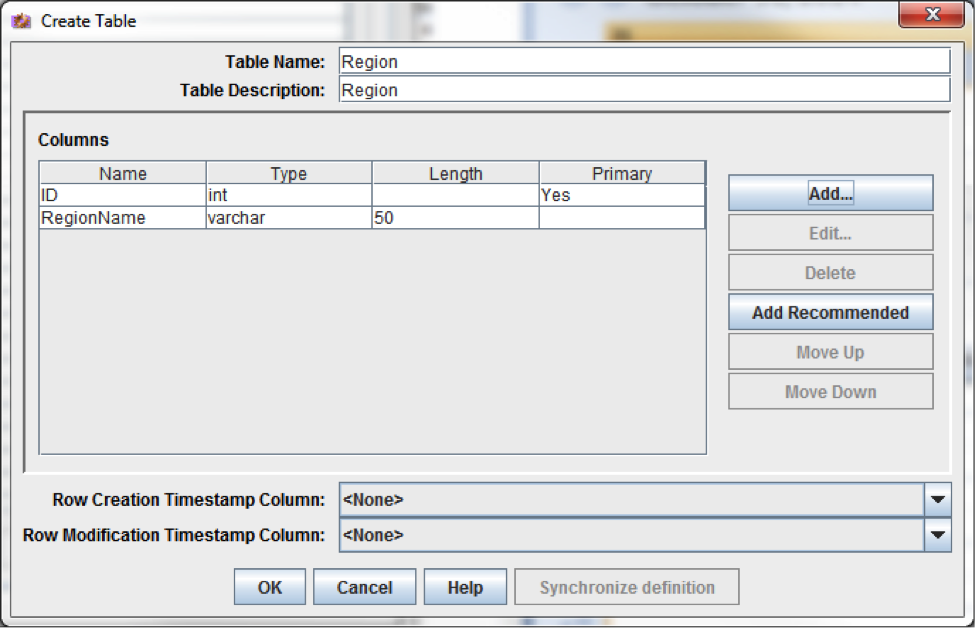
Now that we’ve got a field for Region let’s create a table to hold our regions. Still from within the Configuration Manager, select the Tables tab and click add. Create a region table with an ID and a Region Name as shown below.
Step 3: Create a Country Table
While still in the Tables tab, click Add again and create a table to hold our Countries as shown below.
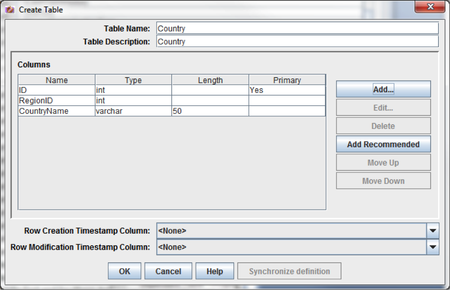
There’s one very important trick to this table. You must have a column which will store the region ID that is associated with each country. In the table above, ID is the Country ID and RegionID is the ID of the region that is associated to the country.
Step 4: Add a Region View
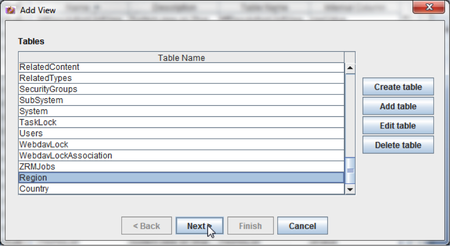
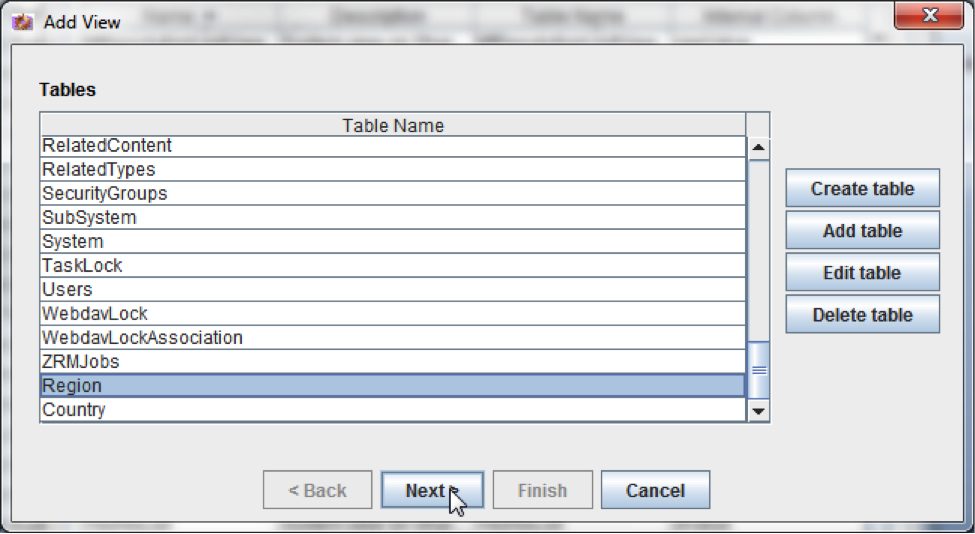
In order to add data to our tables we will need to create a view over them. Select the Views tab from within the Configuration Manager and then choose the Add button to add a view for our Regions table. Select the Regions table from the list and click on Next as shown below.
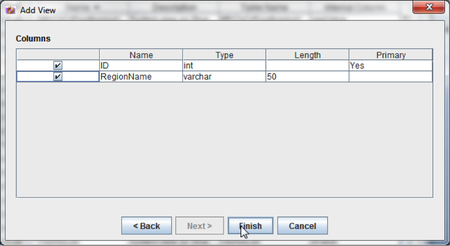
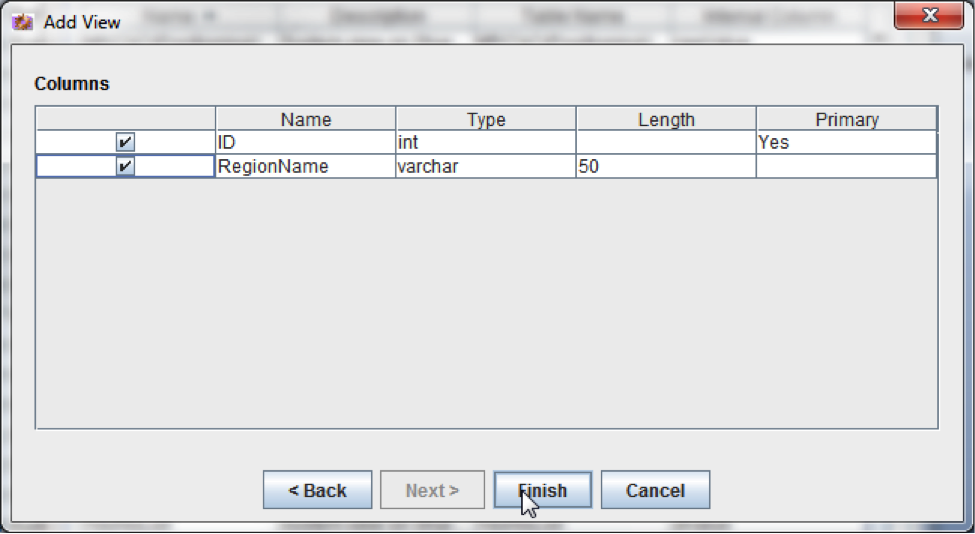
Add both the ID and RegionName columns from our table to the view and click on Finish as shown below.
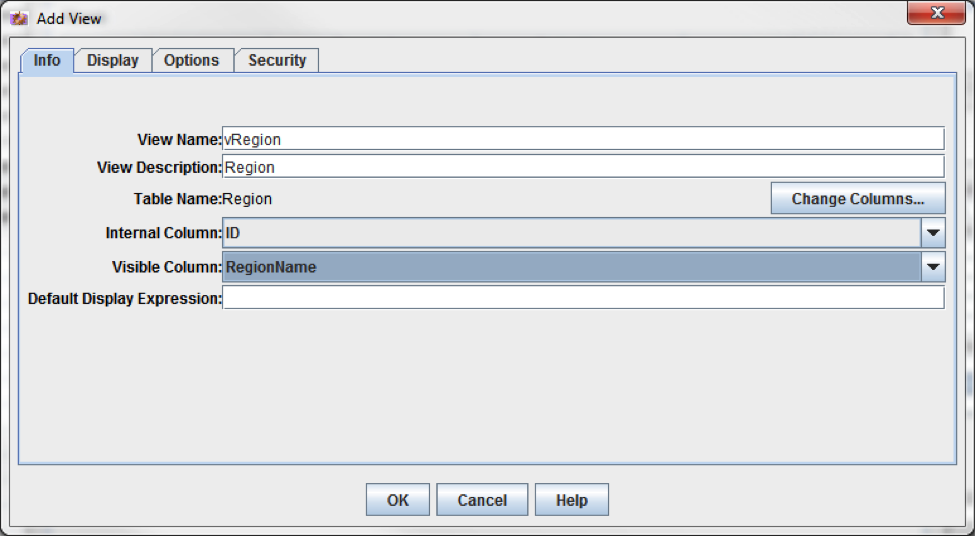
Finally, give our view a name of vRegion and be sure to set the Visible Column to RegionName as shown below.

Step 5: Add a Country View
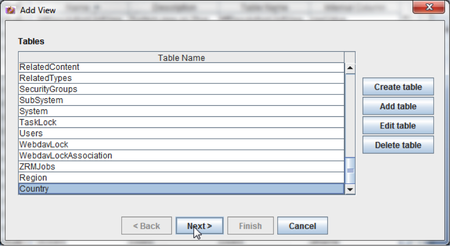
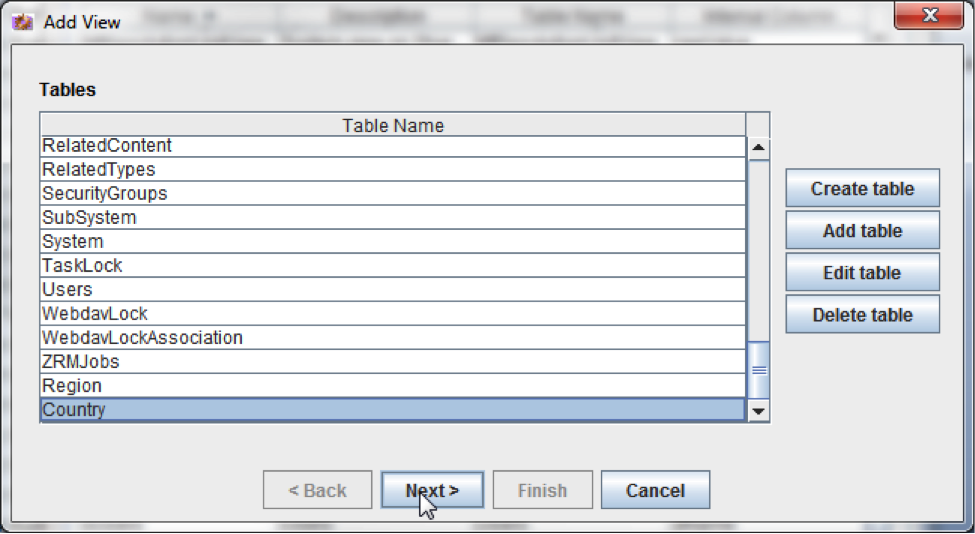
Everyone loves a country view right? Let’s add one following the same procedure we did with Regions. Click the Add button from the Views tab and select the Country table as shown below. Then click Next.
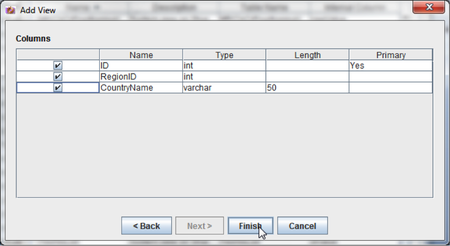
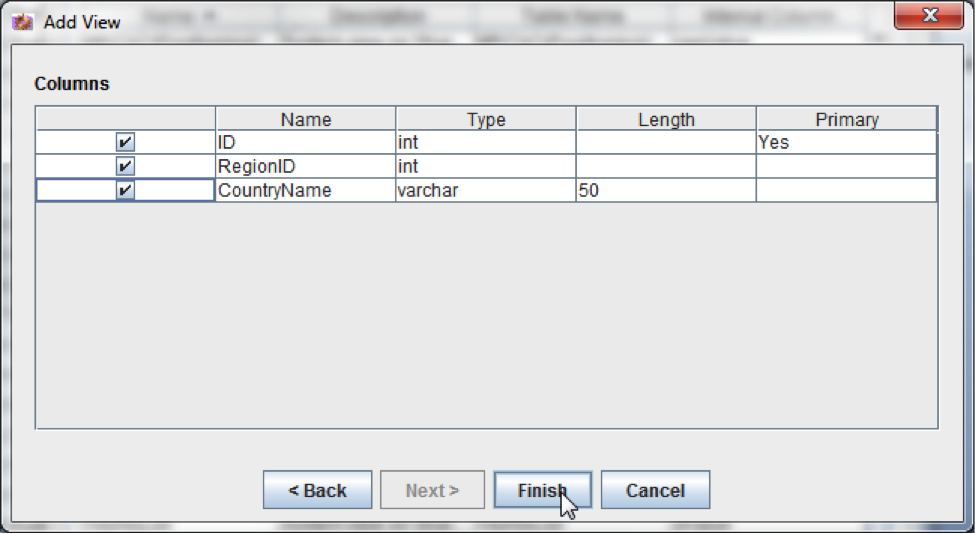
Now we’ll add all three columns of the Country table to our view as shown below.
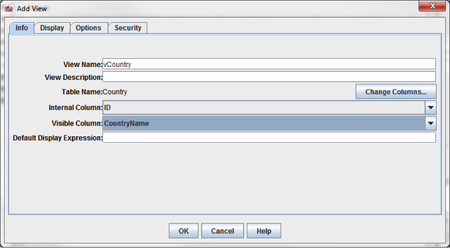
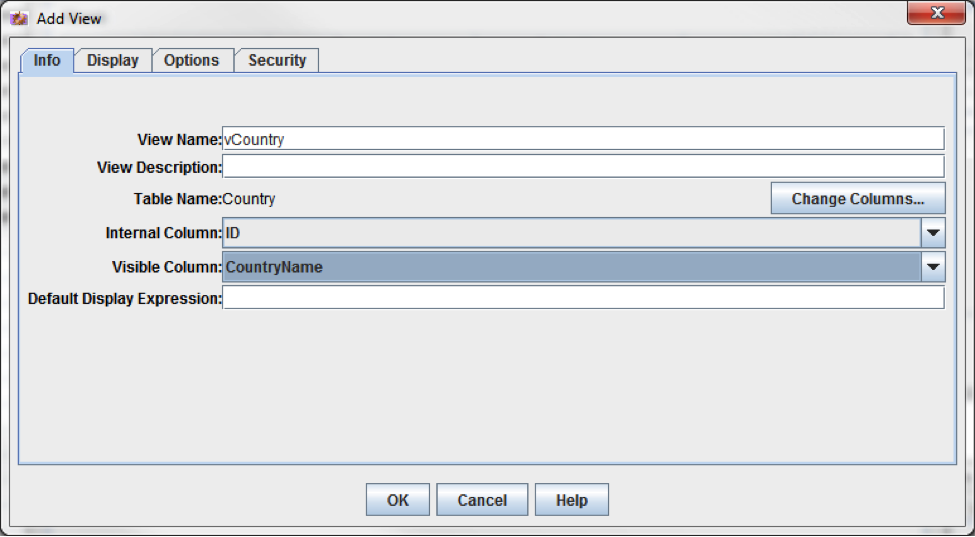
We’ll name this view vCountry and then be sure to set the Visible Column to CountryName as shown below.
Step 6: Create a Relationship
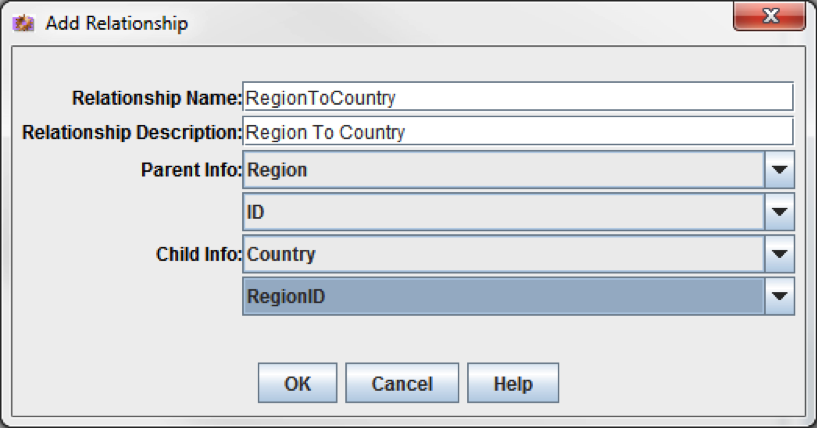
In order for the two tables to know about each other, we must create a relationship. Still within the Configuration Manager, select the Relationships tab and click Add. Then create the relationship as shown below.

To make our lives easier we’ll name the relationship exactly what it is; RegionToCountry. The Parent Info contains the table that holds our Parent table. In this case Region, since countries are contained within regions (i.e. United States is in the North America and Caribbean region). The second drop down in the Parent Info is used to designate the column in that table that will be used to tie the Child table.
For the Child Info we select the Country table as our Child table. Now we’re going to select the RegionID from the Country table as the column which should match the ID field in the Parent Info section. That effectively links the two tables together and establishes a relationship.
Step 6: Update the Region Metadata Field
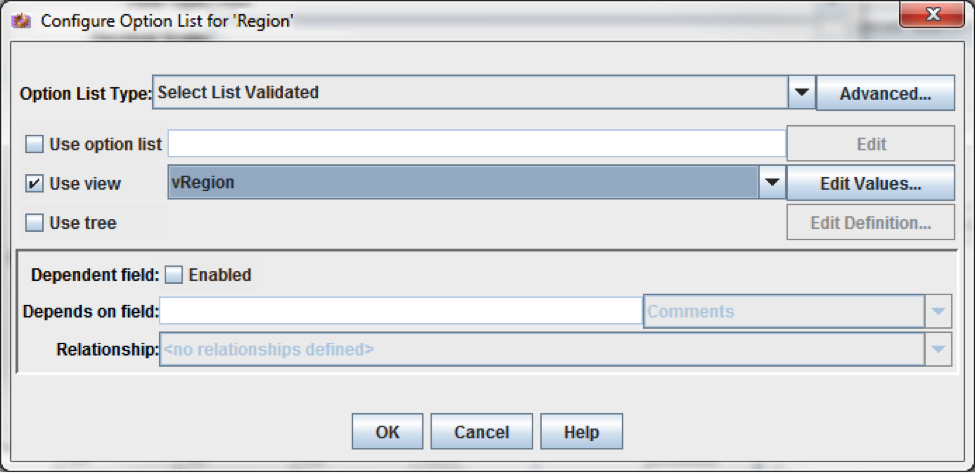
With our tables, views and relationships in place, we can now go back and finish configuring the Region metadata field. Still from within the Configuration Manager, select the Information Fields tab and then highlight the Region field and click Edit. On the Edit screen, check the box to Enable Option List and then click the Configure button.

As shown below, check the box next to Use view and select the vRegion view.
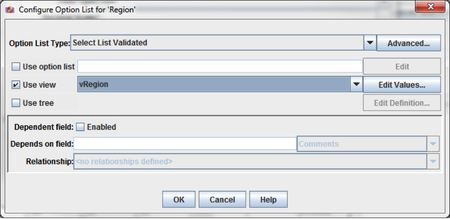
Click OK to complete the configuration. The Region metadata field will now get values directly from our region view.
Step 7: Update the Country Metadata Field
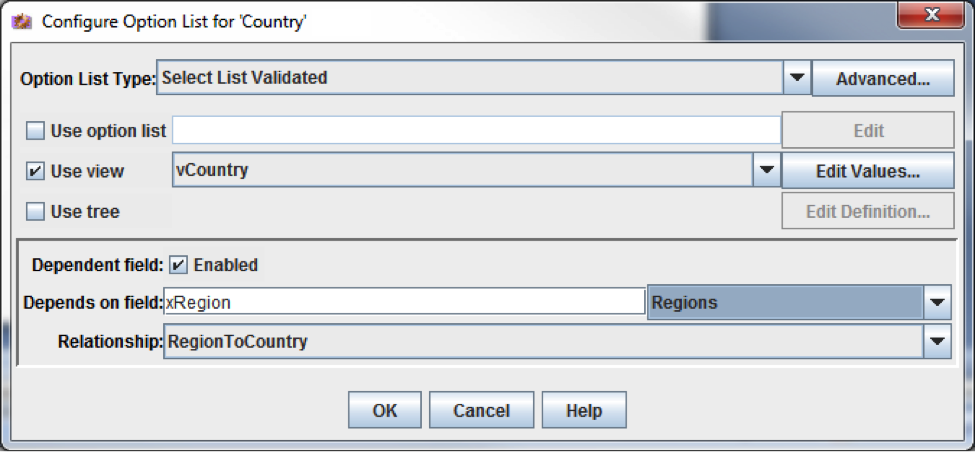
Just as we did with Region, highlight the Country field, click edit, check the box to Enable Option List and click the Configure button. Check the Use View checkbox and select vCountry as the view as shown below.
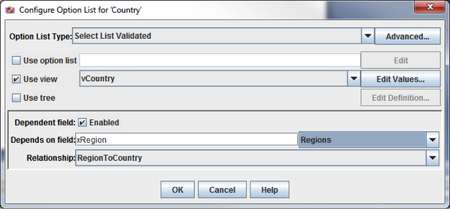
We have one very important last step to complete this configuration. We have to tell the Country field that it is dependent on the Region field. To do that, enable the Dependent Field checkbox and select the Region metadata field.
The last step is to tell the Country field how it depends on the Region field. This is done by setting the relationship. Select our RegionToCountry relationship and click OK.
Step 8: Add Some Data
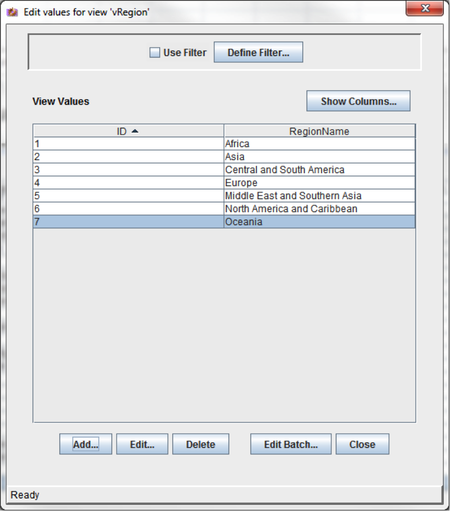
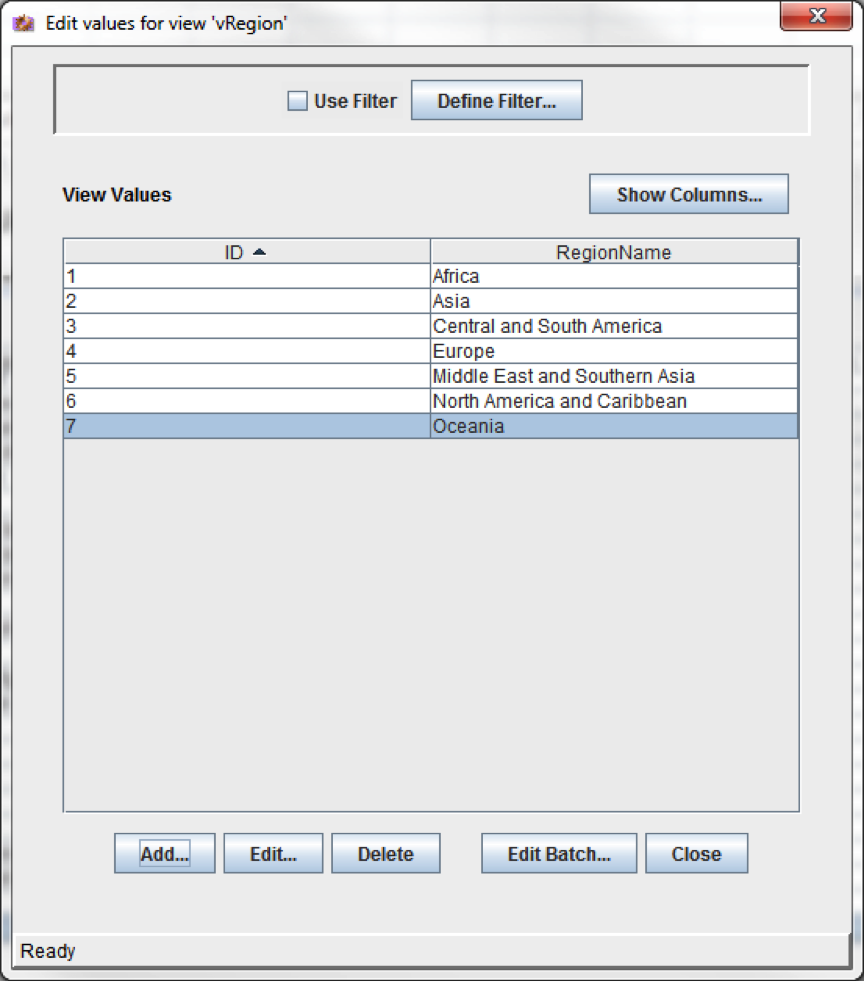
To make everything work, we have to add data to our tables. From within Configuration Manager, click on the Views tab, highlight the vRegion view and then click the Edit Values button (not the Edit button).

On the next screen click the Add button to add ID’s and values to the Regions as shown below.
Once the Regions have been entered, go ahead and enter some countries. Select the vCountry view and click Edit Values just as you did with Regions. Then enter some countries as shown below.
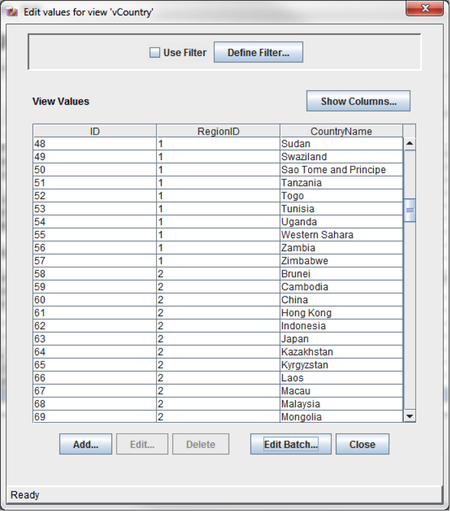
It’s very important that the RegionID is entered correctly in your vCountry view or your dependent choice list won’t work correctly.
Step 9: Test Your DCL
Now it’s time to test. Close the Configuration Manager and then press CTRL + F5 so your browser will refresh the page and clear out the cache. This is important because drop down menu values are often cached. If you don’t clear the cache you will make changes in the Configuration Manager and wonder why you’re not seeing them on the web page.
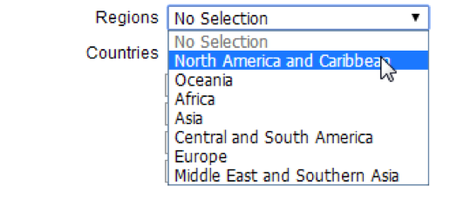
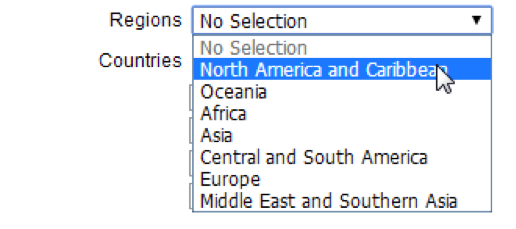
If you select New Check-In you should see a Region metadata field with data that is contained in the vRegions view.
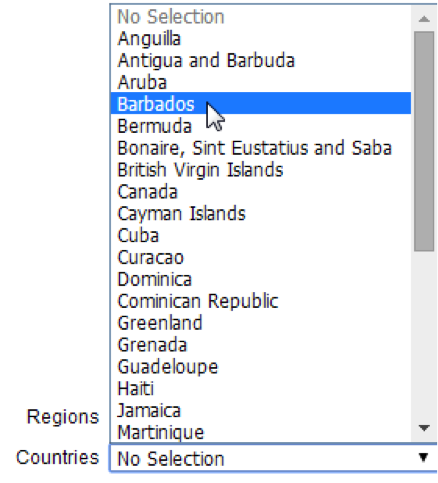
When you select one of the options, you should see that the options for the Countries drop down changes to match only those countries that are within the Region you selected.
DCL Chaining
You can set up many levels of DCL’s in WebCenter Content so field 1 depends on field 2 which depends on field 3 which depends on field 4. As you add levels you add complexity, but the system is capable of handling it if those pesky humans can just manage to keep the data correct.
Multi Select Limitations
As nifty as WebCenter Content DCL’s are they have a couple of important limitations. The first limitation is that DCL’s don’t work as expected if the Parent field is a “multi-select” list. In other words, if I wanted to choose Africa and Asia as my regions and then expect my dependent drop down of Countries to include all countries from both Africa and Asia… that’s not going to work. The dependent list will show only countries for the region that is currently in the drop down selector tool. It will not show any countries for the previously selected regions in the multi-select list to the right of Regions field.
Interestingly, you can have the Child field be a multi-select list. Using our example, perhaps the business wants to be able to select multiple countries from anywhere in the world, but they don’t want a drop down with 300 countries. Using the DCL we created above, the user could select the region, select a country, change the region, select another country and change the region again to select a third country. Now they’ve selected three countries from three different regions without having to scroll through hundreds of countries.
Complex Relationship Limitations
The other significant limitation to WebCenter Content DCL’s is that they’re not meant for complex relationships. While you can “fake” a couple of things, they simply aren’t meant for complex logic. For example, if we had two independent fields of Color and Texture and we wanted a third field to show different values for Blue Smooth things, Blue Rough things, Red Smooth things and Red Rough things. That sort of logic quickly goes beyond the intended use of a DCL.
Summary
The WebCenter Content Dependent Choice List (DCL) is a fantastic tool for representing simple relationships between metadata fields. It makes the user experience easier and helps to maintain data integrity. Hopefully the example above will give you everything you need to deliver some very nice features to your business. If you find that the limitations of DCL’s are cropping up in your business, please contact TEAM Informatics. We’ve got some custom solutions that we can use to deliver the functionality you need to overcome DCL limitations and add tremendous value to the business.
Want to meet us at Collaborate 15 in Vegas to talk about your WebCenter needs? Fill out the contact form and we will work with you to arrange a meeting!
[contact-form to='korey.berg@teaminformatics.com' subject='Message from TEAM Blog'][contact-field label='Name' type='name' required='1'/][contact-field label='Email' type='email' required='1'/][contact-field label='Company' type='text'/][contact-field label='Topics of Interest' type='radio' required='1' options='WebCenter Sites,WebCenter Portal,WebCenter Content,Alfresco One,Google Enterprise Search,other'/][/contact-form]


No Comments Yet
Let us know what you think